Mini-nucs: tips and tricks
Synopsis : More discussion of modifying and maintaining mini-nucs for queen mating; judging queen quality, repeat queen mating, season’s end and overwintering mini-nucs.
Introduction
A couple of weeks ago I described some of the basics of using mini-nucs for queen mating. I’ll try and avoid overlaps with that post in the following discussion of ‘tips and tricks’, effectively a rag-bag collection of stuff I failed to cover last time, interspersed with some typical problems that might be encountered.
Inevitably some of the discussion will be about specific modifications to the particular mini-nucs I use (Kieler or Warnholz polystyrene mating nucs). I settled on these because I needed a dozen one season, I had zero experience in using any so had nothing to compare and I couldn’t afford Apidea’s.
Overall I’ve been reasonably satisfied with the choice my younger, poorer {{1}} and (even more) ill-informed self made. Over a decade later I’m using the same mini-nucs and I’ve not been tempted to try anything else {{2}}.
Nevertheless, despite a Kieler-centric flavour to some of the comments below, most still apply directly (or with a little finagling) to other makes of mini-nuc.
Finally, I’ll repeat the point I made last time … mini-nucs are ’high maintenance’. They are not ’fit and forget’ beekeeping. Unless placed in the shade they may well abscond on a lovely day {{3}}. Late in the season, without care and attention, they can get robbed out by wasps in hours. If there’s no nectar flow they will need feeding.
But, looked after carefully, they can be an efficient way to get queens mated .
Painting and decorating
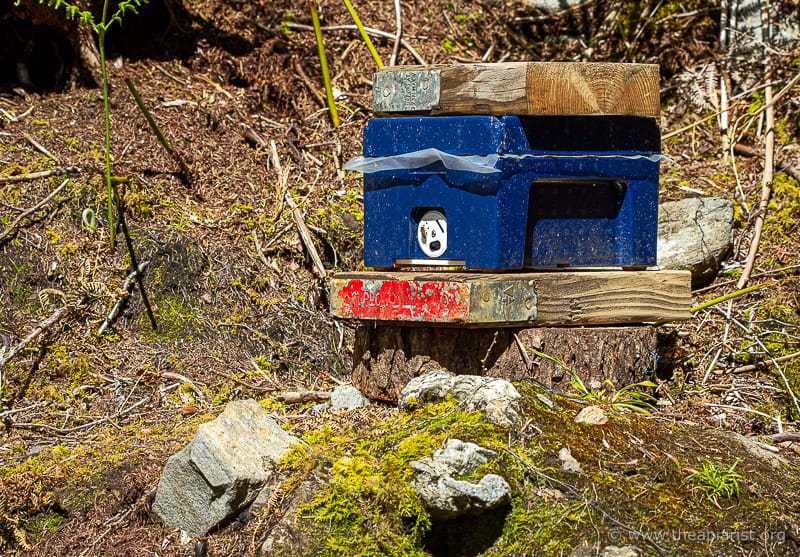
Any poly hive needs painting to protect it from UV degradation. Most of my mini-nucs were first painted with el cheapo masonry paint. This has a matt finish and has been reasonably hard wearing.
More recently, I’ve started painting – or overpainting – them with Hammerite garage door paint. This is an oil or solvent based gloss paint. It causes the surface of the polystyrene to melt (very slightly) and therefore bonds extremely well. The Swienty brood boxes I painted several years ago look as good now as they did then. The Hammerite paint comes in a range of colours, including a rather nice green or blue.
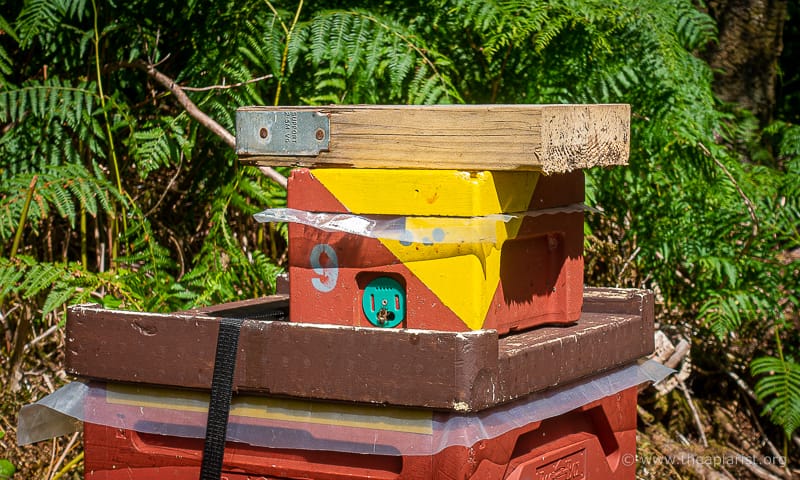
Successful queen mating needs reasonable weather (and patience). However, it also needs the returning mated queen to successfully find the mini-nuc she set out from. It therefore makes sense to either place the mini-nucs in separate and distinctive locations, or (perhaps that should be and/or) to paint them in distinctive colours.
I tend to place mine in pairs and so often have a plain and coloured one on the same stand, facing in opposite directions to further help the queen discriminate between entrances.
Entrances and exits
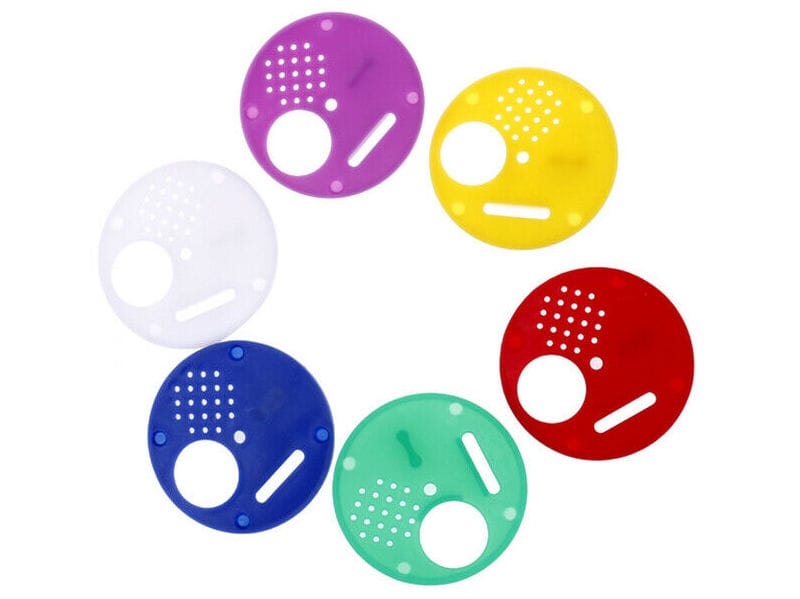
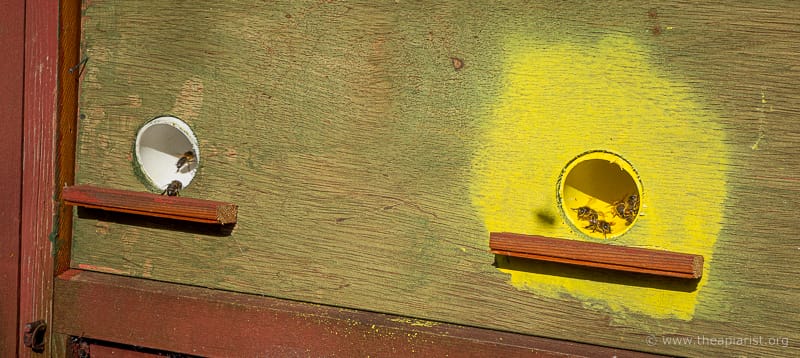
Kieler-type mini-nucs have a rotatable entrance with three or four options – blanked off, ventilation, a queen excluder or fully open. I shouldn’t need to mention that, if there’s a virgin queen in the hive (that you want mated), the entrance must be fully open.
But I will 😉
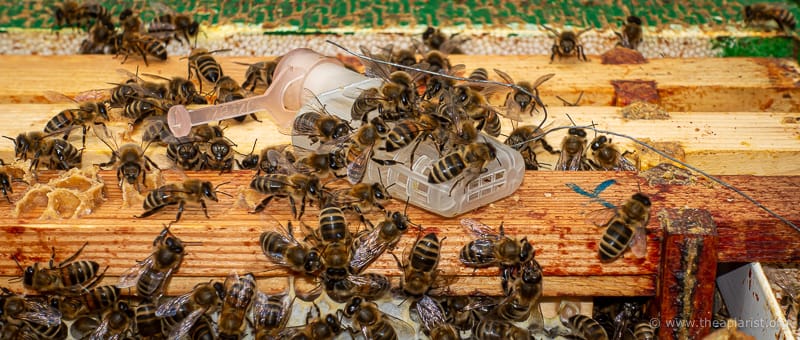
You can purchase replacement entrance disks like those in the photo above from a range of suppliers (or eBay, which is significantly less expensive). Using these may help queens return to the correct mini-nuc after orientation or mating flights.
Oops, almost forgot … bees have a tendency to nibble away at the polystyrene around the entrance of these Kieler nucs (or at the ‘under entrance’ which I’ve never used) while confined. It’s therefore worth painting the entrance tunnel as well as the outside.
Crownboards
Apidea’s and several other mini-nucs I’ve looked at are sold with clear semi-rigid plastic crownboards. Some have integral flaps for adding the queen cell or feeding the mini-nuc without letting clouds of bees escape (admittedly small clouds, as they’re only primed with a few hundred millilitres of bees).
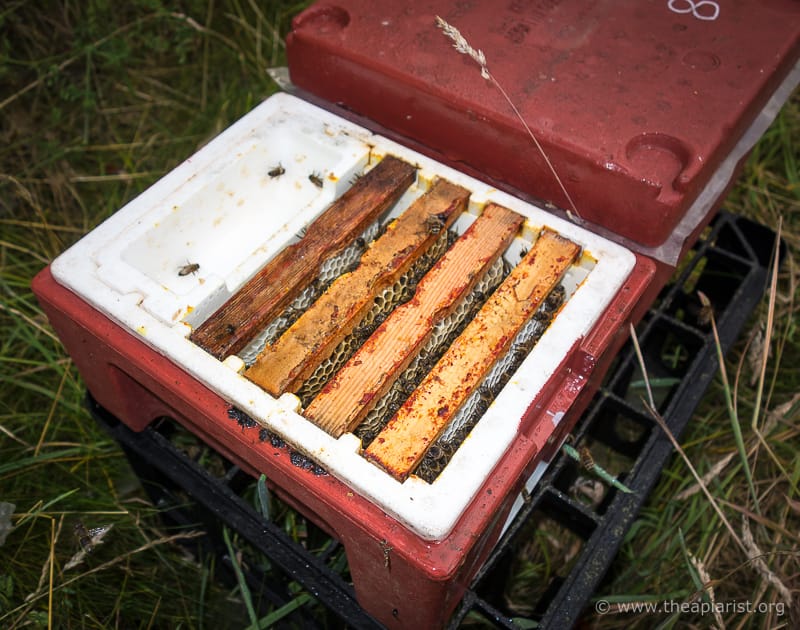
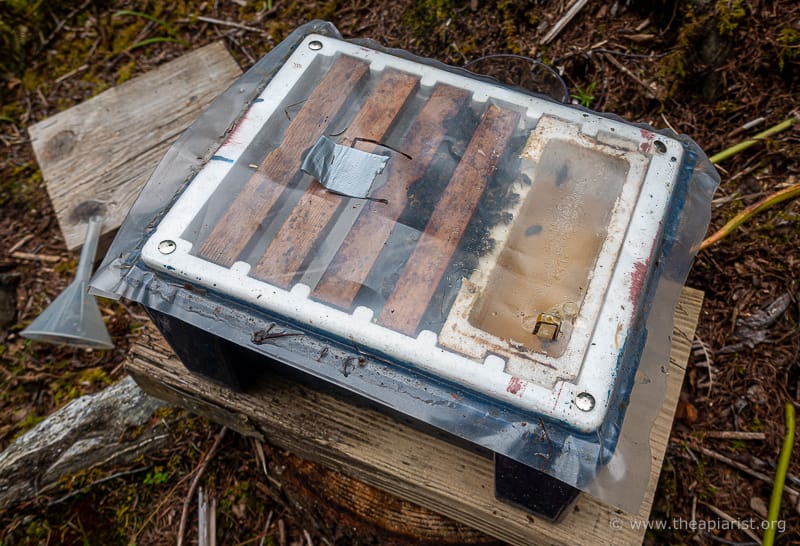
Kieler’s are sold without a crownboard. Don’t let that put you off. A thick piece of clear plastic works just fine as a crownboard and you can easily engineer (i.e. cut) a small flap to add the queen cell between the topbar frames. I use a small piece of tape to hold in down.
You can put an additional small flap above the feeder that allows you to add syrup without any bees escaping. This only needs to be a few millimetres square and doesn’t need taping down. Even if you don’t think you’ll be feeding syrup – which you do using a small funnel – this modification takes seconds and won’t be in the way (but you’ll be glad it is there if you need it).
Hold the crownboard in place with drawing pins. That way there’s less chance it will blow away should you open the box on a windy day. It also means the crownboard stays stuck to the brood body, rather than being removed with the tightly-fitting roof.
Feeder mods
The Kieler integral feeder has some good and bad points.
It’s a good size, so reducing the chance of the mini-nuc starving if left for an extended period. However, this inevitably cuts into the space available for bees and brood, meaning that retention of the feeder can lead to rapid overcrowding.
You win some, you lose some!
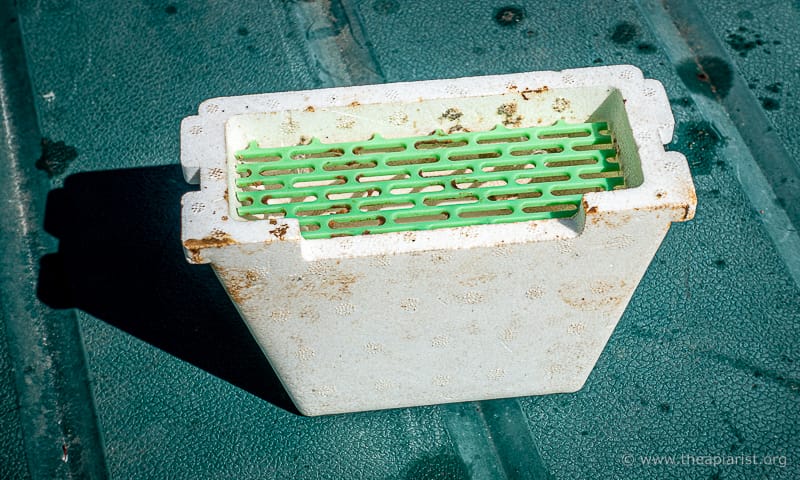
The feeder is easy to remove and only fits in one orientation. Irritatingly it is too deep to fit into the ‘second storey’ extension (see below). It also has no cover or queen excluder and the queen can sometimes end up in the feeder, particularly if the bees build comb there.
I therefore usually fit a small rectangle of plastic queen excluder, balanced on map pins stuck into the inner walls of the feeder. This stops the queen entering the feeder, but doesn’t necessarily stop the bees building comb there.
Be thankful for small victories … 😉
If you need more brood space you can easily replace the integral feeder with a homemade frame feeder designed to feed fondant. I build these shorter than the integral feeder so that they can be used interchangeably in the ‘second storey’ extension.
These work well, cost pennies to make and can be quickly exchanged when needed. When I’ve overwintered queens in these mini-nucs I’ve always used these fondant frame feeders in the upper storey, with frames filling the entire lower level. This reduces disturbance when you need to feed them.
Frames
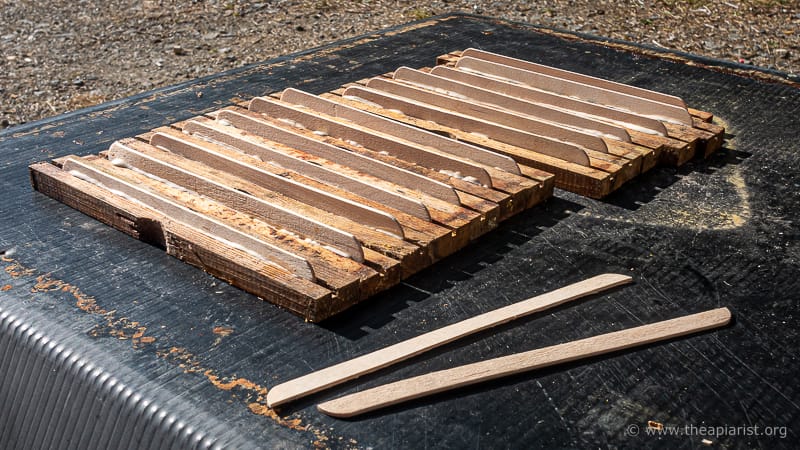
The Kieler is a mini-topbar hive. Each topbar has a longitudinal slot cut into its underside designed to take a strip of foundation. They also have a ‘pinched’ central area, so that a queen cell can be easily inserted between two adjacent bars.
The bars themselves are just 15 x 8 mm softwood. Purchased separately they cost 36 p each (Yikes! … and those don’t even appear to have the central pinched indent).
If you need more (and you will … to replace losses and for the the upper storey should you buy one) just make your own with some wood from the store, a metal ruler, a Stanley knife and some antiseptic cream and Elastoplast.
And, while you’re at it, don’t go fiddling about with little strips of foundation held in place with melted wax. I did this for years. They work perfectly well, but they are fragile. The foundation in unused topbar frames will get bent or broken, and then you’ll have to start all over again.
Instead, eat as many Fruit Splits, Rocket lollies or Twister’s as you can stomach {{4}} and keep the sticks. Split these lengthwise and glue them into the longitudinal slot in the Kieler topbar using normal wood glue and {{5}} never re-wax them again.
And, no, you don’t need to cover them in melted wax or anything else. All the bees need is a guide to help them draw the comb in the right place.
I’m sure there’s stuff I’ve forgotten about, but that lot will do for the moment. Let’s move on to four specific practical aspects of using mini-nucs.
Judging queen quality
You can’t … or at least I can’t.
I don’t think you can meaningfully determine the quality of the queen in a mini-nuc. The time between when she starts laying and when she runs out of comb is sometimes too short to even check whether she’s producing worker brood.
I usually leave her in the box until there’s some capped worker brood present and then – ideally – move her to a 2-5 frame nucleus colony. At the same time I clip and mark her. As long as she’s laying one egg per cell (and she sometimes starts laying more than this, but should slow down after a day or so) and the brood develops into worker brood then things should be OK.
However, it’s not until she’s laid a full frame or three of brood that you can judge the laying pattern (remembering that the laying pattern may also depend upon the bees in the box with her).
Furthermore, to properly judge her you need to observe the behaviour of the bees that develop from the eggs she lays.
Are they well tempered? Are they steady on the comb? Do they have the other traits you are keen to promote? Frugality? Good pollinators? Preferential collection of avocado nectar (Afik et al., 2010).
OK, perhaps not the last of those, but you’d be surprised about the traits some beekeepers favour.
Queen introduction
I remove the mated queen from the mini-nuc, place her in a JzBz cage without attendants and introduce her in the usual way to a queenless full-frame nucleus colony; I leave the sealed cage hanging between frames overnight and – assuming there are no signs of aggression to the caged queen – I remove the plastic cap and leave the workers to eat their way in through the fondant-plugged entrance/exit tube.
If there are signs of aggression, leave it another 24 hours.
A well designed introduction cage has some protection for the queen so she can avoid aggressive workers that can otherwise damage her feet. I’ve had considerable success with the JzBz cages (and happen to have inherited a bucket full and so don’t use anything else 😉 ).
I’ve inadvertently left a queen trapped in one of these cages for 6 days with no ill effects. Don’t rush things.
Rear some spares
What do you think happens with commercially reared queens, many or most of which are mated from mini-nucs?
Exactly … nothing, other than being popped into a shipping cage and having a £40 price tag attached.
In contrast, you have the opportunity to check your queens more thoroughly.
Rear a few more than you need, check out their performance, keep the best and donate the unwanted to one of the many, many beekeepers clamouring for queens – particularly late in the season. Even the also-rans are likely to be OK {{6}}. Not necessarily great, but more than good enough to get the colony through to the next season {{7}}.
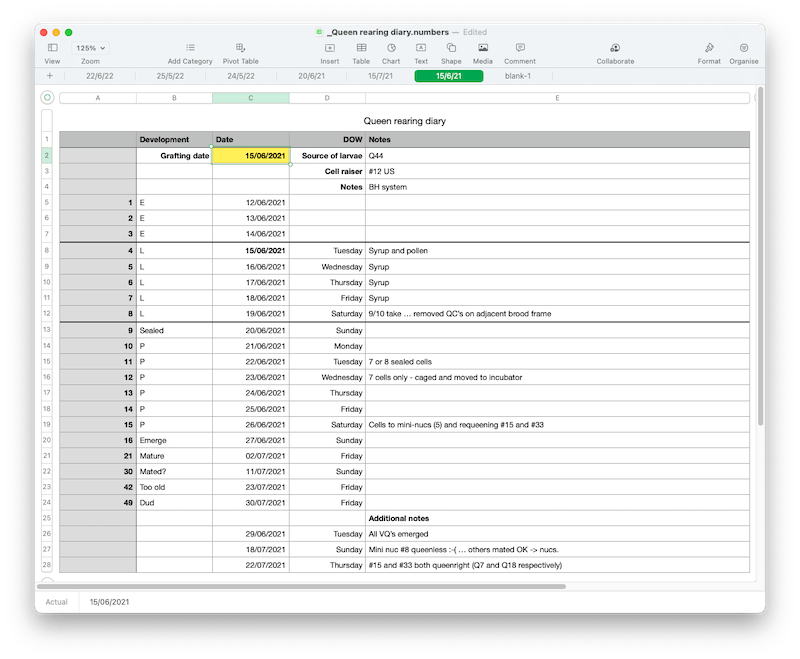
And finally, make sure you keep good records. The first couple of times you do this you’ll think you will be able to remember the key points the following year; the dates of emergence, the time it took to have mated queens, the origin of the queen cell used to prime the mini-nuc etc.
But you probably won’t. The notes will be very useful for planning your queen rearing the following season.
Keeping things going
Populating mini-nucs early in the season is often a thankless and unpleasant task. The weather is cool, the bees are tetchy and – as described a fortnight ago – you may have had to shake through the colony twice to get the young workers.
That’s not the sort of task I like to repeat if I can possibly avoid it.
If you’re rearing queens all through the summer you can simply remove one mated queen and, shortly afterwards (within a few hours), add a new mature queen cell. This is the ideal situation and, with good organisation, good weather and good mating success, you can get three or four queens out of a single mini-nuc in one season.
Mainly good organisation.
You need to ensure you have a succession of mature queen cells ready at the about right time, remembering that queen mating often takes longer than expected (or wanted).
Scrub ‘caretaker’ queens
If that’s not possible, or if you want (or have) to interrupt queen cell production (e.g. your queenright cell starter swarms or a round of grafting fails) you can remove the mated queen from the mini-nuc and allow the bees to rear a ‘scrub’ queen.
A well populated mini-nuc will readily do this. The resulting queen is usually a bit on the small side, but she will keep the worker population ticking over and ready to accept a new mature queen cell in due course. In addition, the enforced brood break while they rear the scrub queen helps prevent the mini-nuc from getting too overcrowded.
These ‘caretaker’ queens are reared under the emergency response and – assuming there are suitable eggs in the little colony – emerge about 15 days after you remove the mated queen (remember, the bees preferentially choose 3 day old eggs to rear queens under the emergency response). A fortnight or so later the queen should be mated and laying. This approach therefore means you can take 4-6 weeks off if needed.
The end of the queen rearing season
What do you do with the contents of the mini-nuc after you’ve taken the last of the mated queens out? The little hive may well be bursting with bees, with all 4-6 combs containing brood.
Many beekeepers shake the bees out in front of a strong hive. The majority of the workers will be accepted, but the brood is wasted.
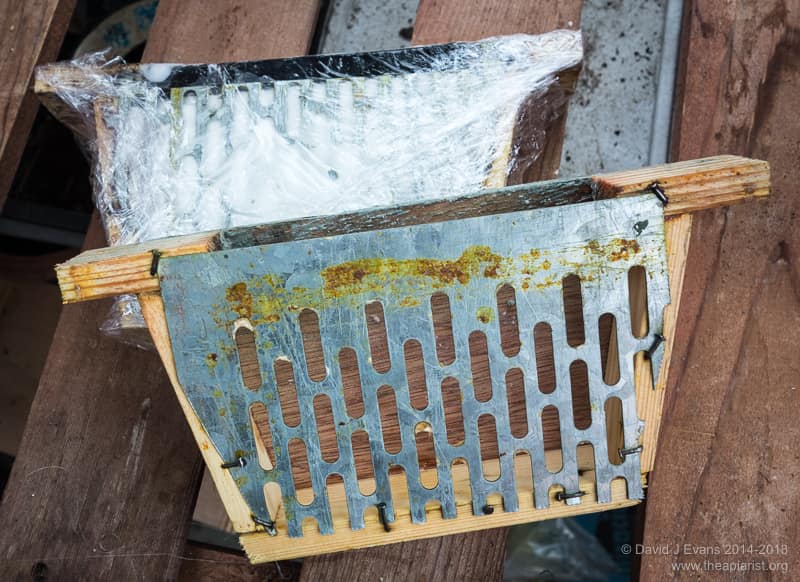
To avoid this I’ve used ‘zip’ ties to secure two Kieler topbar frames into a standard brood frame. At the very least these can be placed into a full sized hive for the brood to emerge. Usually, by the time of year I get round to this the bees have stopped drawing comb. Once the brood has emerged I move the frame to the side of the brood box and remove it.
Dave Cushman has details of some clever frame modifications that allow Kieler-type (he calls them Kirchhain mating hives) frames to be drawn at the beginning of the season and used to accommodate brood-filled frames at the end.
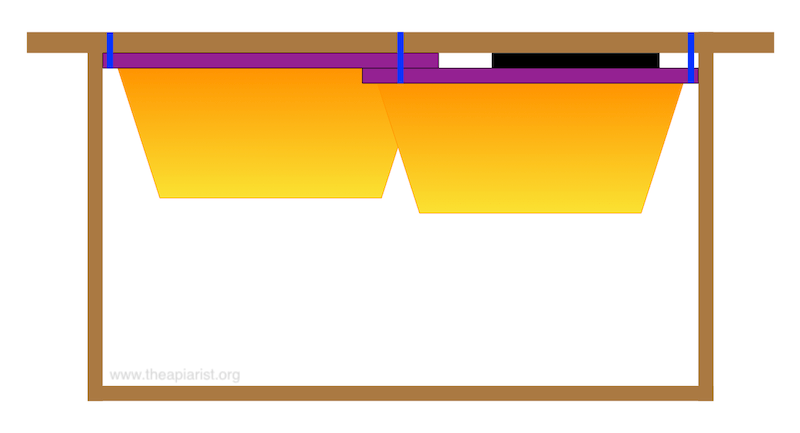
Unsurprisingly, when I’ve done this it’s been a lot more ’Heath Robinson’. The Kieler topbar frames are a little too long to fit end-to-end in a National frame. I therefore built some with a scrap 8 mm thick spacer (shown in black below) tacked under one side of the frame. I then use zip ties to hold everything more or less in place.
Despite being a total bodge this has generally worked well. I’m pleased not to waste the brood.
Now I know the air freshener trick (described in this 2020 post) I’d probably just add the frames as shown in the diagram above together with the adhering bees, and give them and the recipient colony a quick blast of ’Sea breeze’ before uniting them.
Overwintering mini-nucs
Alternatively, with a little care you can overwinter queens in mini-nucs. This saves you the faff of emptying them at the end of the season, and means they are ready for queen cells the following year (after removing the queen of course) {{8}}.
I’ve overwintered queens successfully quite a few times but certainly don’t consider myself an expert at it. There’s quite a high attrition rate. Remember how small these colonies are, how limited the space is for stores and the relatively small population of bees present to stop the colony freezing in the winter.
I think every mini-nuc I’ve overwintered successfully has been a double-decker, with the standard Kieler brood box underneath an additional extension brood body. These almost double the volume of the mini-nuc.
The mini-nuc needs to be strong in mid/late autumn, almost certainly boosted by combining the contents of two separate mini-nucs. You can unite them over paper in the same way you’d treat a full sized hive.
Unfortunately, the upper and lower brood boxes have different depths, so comb drawn in the bottom box needs to be trimmed to fit in the upper box. A messy and irritating task.
I replace the lower integral feeder with additional brood frames and place one or two fondant frame feeders in the upper chamber – usually one at either end to ensure the mini-cluster is near to one of them.
Place the box somewhere sheltered, leave the entrance open to allow the bees to fly for cleansing flights and cross your fingers …
Gimme shelter
I’ve not overwintered mini-nucs since returning to Scotland, though I know several beekeepers here who do this successfully. In the Midlands we often had quite harsh winter weather – certainly much colder than we usually get here on the north-west coast of Scotland.
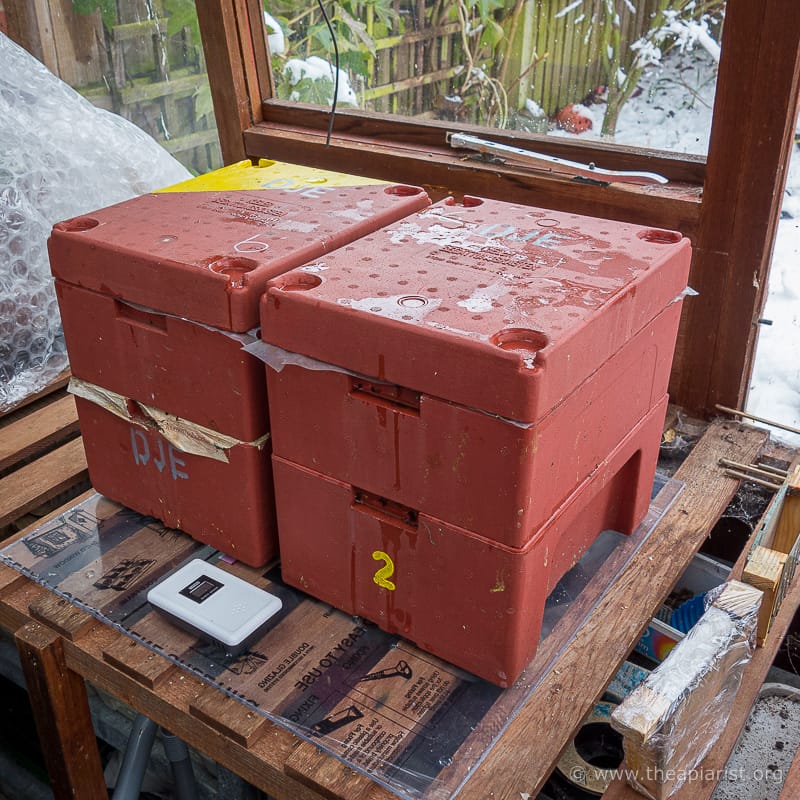
A decade ago, well before my bee shed experiments, I was successfully overwintering mini-nucs in an unheated greenhouse with entrance tunnels from the hive to the outside. These worked surprisingly well and got queens through some really hard weather (note the snow in the picture above – late March 2013).
If the winter was particularly severe I would cover the mini-nucs with a thick layer of bubble wrap to try and retain as much warmth as possible. The levels of stores needs to be checked regularly, particularly once brood rearing starts in earnest. These little colonies can starve surprisingly quickly 🙁 . It takes seconds and causes minimal disruption to swap out those fondant frame feeders.
With a little luck and the normal amount of good judgement it was sometimes possible to remove the overwintered queen to make up a nuc in mid/late April, replacing her with a queen cell from the first round of grafting.
Of course, it rarely worked quite as smoothly as that … 😉 {{9}}
Finally
The one thing I would not recommend you try is allow the mini-nuc to build up to a full-sized nuc without supplementing it with additional brood and bees. A mini-nuc is too small and it will take too long rearing a few hundred bees at a time to make even a five frame nuc. I’ve tried and it’s a waste of effort.
References
Afik, O. et al. (2010) ‘Selection and breeding of honey bees for higher or lower collection of avocado nectar’, Journal of Economic Entomology, 103(2), pp. 228–233. Available at: https://doi.org/10.1603/ec09235.
{{1}}: Even younger, even poorer?
{{2}}: Actually that’s a fib … of course I’ve been tempted but I’ve not succumbed to temptation. As I said last week, the choice is much more extensive these days but – even so – I might well opt for Kieler’s again.
{{3}}: Even in the shade they might still decide to up sticks.
{{4}}: Or anything else as long as it has one of those ‘old fashioned’ parallel-sided lolly sticks.
{{5}}: Praise be!
{{6}}: Queens, not beekeepers.
{{7}}: Ditto … unfortunately not enough beekeepers are good enough to get their colonies through to the next season.
{{8}}: You may also need to bleed off brood and bees if the mini-nuc gets too strong before the queen cells are ready. This takes some skill and I’ve often got things wrong.
{{9}}: Largely due to the normal amount of good judgement … i.e. precious little.
Join the discussion ...