Let there be light
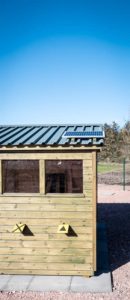
Our new bee shed provides a protective environment for hives, allowing inspections in most weather conditions if needed. The only exception is during extended cold periods when the colonies remain clustered. The shed is south facing and gets whatever sunlight is available from early/mid morning depending upon the season. This warms the shed nicely and, because of the seven 50 x 50cm windows along the side {{1}}, provides light to work the colonies.
But – believe it or not – the East coast of Scotland is not always sunny. Although it is one of the sunniest places in Scotland, with an average of ~1500 hours of sunshine a year {{2}}, it is not always bright when I need to inspect the colonies.
And if it is grey and overcast outside it can be really murky in the bee shed.
This was the only significant drawback of the original bee shed which – due to its orientation – got no direct sunlight through the windows from early/mid-afternoon. Consequently, late afternoon inspections on gloomy days could be a bit testing. There was enough light to find the queen and observe the general state of the colony, but finding eggs or distinguishing the age of larvae – something critical for our research – was very hit and miss. It was usually necessary to take frames to the open door to see things better.
Which, of course, was not ideal if it’s chucking it down or windy outside, the very conditions that justify using a bee shed in the first place.
LED lighting systems
Therefore, in addition to orientating the new bee shed to maximise light throughout the day, I’ve also installed a 12V LED lighting system. These are available in kit form or you can easily purchase the necessary components – battery, solar panel, charge controller, cable, lamps and a switch – individually {{3}}.
For convenience I used a Geo 4 Solar Lighting Kit from the Solar Centre. It’s not the cheapest way to get started, but at least all the components should be compatible and there are some (rather perfunctory) instructions provided. There’s also a useful YouTube video linked from the suppliers website.
The kit includes a single 30W solar panel and six 40W-equivalent LED bulbs. The latter seemed unlikely to be bright enough to help see eggs and developing larvae so I’ve replaced them with 9W LEDs, equivalent to about 120W incandescent bulbs {{4}}.
Battery
The Solar Centre also sell suitable batteries for solar power systems … but at daft prices. I therefore sourced one elsewhere, ending up with a 100Ah leisure battery {{5}}. This is probably overkill for lighting the shed … my back-of-the-envelope calculations suggest this battery will run the six 9W LED lamps for over 20 hours from a full charge {{6}}. However, there are additional things I want power for in the shed including some hive monitoring equipment, so the excess capacity will come in useful.
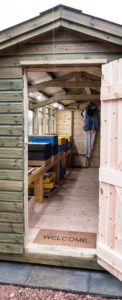
The battery is hidden away in the corner of the shed inside a battery box. This includes USB and 12V outlets, enabling additional things to be hooked up in due course.
Installation
This was pretty straightforward. It was simply a case of rigidly adhering to red = positive and black = negative cabling, connecting all the bulb holders together, wiring up the switch and the charge controller, hooking up the solar panel and screwing in the bulbs.
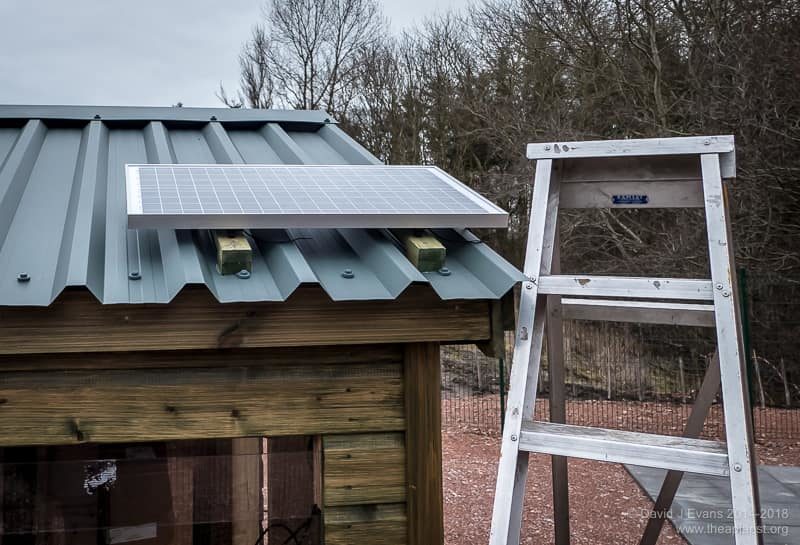
The solar panel was fitted to the shed roof. This caused a few problems. Firstly, the roof is at an angle of ~25°. This appeared to be less than optimal for a solar panel at the latitude (56° N) of the shed. The usual way to determine the panel angle is to add 15° to the latitude in winter, or subtract 15° from the latitude in summer – the difference to take account of the angle of the sun in high summer or midwinter.
Since the lighting will be used mostly in summer – during inspections – I sketched a few possible bracket designs to angle the solar panel at about 40°. However, I ran out of time and enthusiasm, so ended up fitting the panel directly to the roof.
I subsequently discovered an alternative way of calculating the optimal angle for a solar panel – multiply the latitude by 0.9 and subtract 23.5 i.e. (56 * 0.9) – 23.5 = 26.9°, which isn’t significantly different from the angle of the roof in the first place 😀
Switches
The lighting system has a standard on-off switch. However, I’d wanted to install a simple time switch which would automatically turn the lights off after a fixed period, for example one hour. This would avoid draining the battery should the system be left on inadvertently. The 12V timer I bought came with no comprehendible instructions and I’ve so far failed to get it to do what I want.
As an interim measure I’ve fitted a kitchen cupboard “on when open” circuit breaker in series with the main switch. The lights only turn on when the shed door is open. When working in the shed the door is almost always left open with the smoker left on the step outside. If this isn’t done there’s a tendency to end up getting ‘kippered’ as the shed fills with smoke 😉
The wiring is spectacularly bad – in true Dr. Bodgit style – but it works just fine.
Bulb holders and reflectors
The bulb holders were fixed to the shed roof, more or less directly above the position of the hives. Due to the angle of the roof this places them above head height – so little chance of hitting them with your head – but it does mean they are rather dazzling.
It’s no use fixing them down the centre of the roof as the light is then behind you when conducting inspections, so negating most of the benefits of installing the lighting system in the first place.
Therefore, to avoid retinal burns (!) I’m investigating simple white Correx ‘reflectors’ nailed to the roof battens near the lamps. These should angle the light better into the hives.
Finally, to allow future changes to the lamp holder positions should they be needed, I allowed additional cable between them, all held in place using lots of cable clamps.
There should be bees in the shed by the time this is posted. However, we’ll need to wait a few weeks until it’s warm enough for routine inspections before we can be sure the lighting system is optimal.
Colophon
Let there be light is a Biblical phrase from the third verse of the Book of Genesis. Many academic or educational institutions use the phrase in Latin, Fiat lux, as a motto.
Inevitably the phrase is also used as the basis for a large number of quotes, including my particular favourite (from the actress and comedian Ellen DeGeneres) “In the beginning there was nothing. God said, ‘Let there be light!’ And there was light. There was still nothing, but you could see it a whole lot better.“
{{1}}: One per hive when fully occupied.
{{2}}: In comparison, the South coast of England is the sunniest spot on the mainland, with annual figures of ~1800 hours per year.
{{3}}: I’ve not yet accurately worked out the saving if items were purchased individually, but it would undoubtedly be less; solar panels are ~£35, charge controllers ~£12 to £30, cable, clamps and clips would be less than a tenner, lamp holders and 9W LED bulbs would be ~£40 to £70, switches and miscellaneous items another tenner … and the cost of sourcing that lot and trying and making sure it was all compatible … £priceless.
{{4}}: LED bulb ‘wattage’ is actually a bit meaningless and it’s better to express brightness in terms of lumens. I chose 9W cool white LED bulbs which generate ~700 lumens each.
{{5}}: The Solar Centre quote £250 for a 110Ah battery. For comparison, I purchased a well-reviewed 100Ah battery for less than £80.
{{6}}: The maths are easy. Calculate the current (amps) by dividing the wattage by the voltage – in this case 6 x 9W divided by 12 Volts = 4.5. Then divide the battery Amp hours by this number – so 100/4.5 = ~22 hours runtime. Approximately.


Join the discussion ...