Ben Harden queen rearing - cell raising
[See previous posts on introduction, setup and grafting for queenright queen rearing]
With any queen rearing it is critical to be aware of the timetable. Eggs are laid, hatch on day three, grafted on day 4, queen cells are sealed on day 9 and the virgin queens emerge on day 16. There’s not much variation around these timings; if you graft a larva that is too old it will still be sealed into the cell on day 9 (after the egg was laid), but will have had less opportunity to feed well and so may generate a sub-standard (‘scrub’) queen. If you thought the larva was 18-24 hours old, but it was actually 48-60 hours old, it will emerge up to a day and a half before you expect it to.
This is “not a good thing” as the newly emerged virgin will run amok through the colony destroying all the other queen cells which will then be partly or completely torn down. Alternatively, if all of the larvae are a little older than you thought they’ll all emerge and have a melee in the upper brood box of your colony setup for Ben Harden queen rearing. If you’re really unlucky an undersized virgin will squeeze through the queen excluder and slaughter your mated, laying, queen in the bottom box. All of this can be avoided by understanding the timing of events involved in queen development and keeping good records.
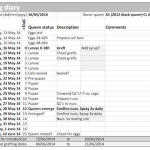
BIBBA provide a copy of Tom Robinson’s table, essentially a queen rearing diary in Excel format. It’s designed for using Jenter or Cupkit systems, rather than grafting, but the underlying development timetable – the dates when the cells are sealed and when the queen emerges – are of course identical. I’ve modified a copy to suit my own queen rearing programme, using grafting and mini-nucs. By simply entering the grafting date, the remainder of the timetable is automagically completed, so there should be no reason to miss one of the critical dates. In the same way that good records are required to select stock to graft from, you should keep a record of both the queen rearing activity and the performance of the resulting queens.
Getting the timing right
How can you avoid early-emerging queens? Pretty easily in practice, as long as you do the following:
- Graft young larvae only – following the guidance in the earlier post on grafting.
- Check the larvae within 24 hours to ensure they have been accepted.
- Check on the day the cells should be sealed.
- Check them finally 24-48 hours before expected emergence. By this time the sealed cell may show signs of being crowned – a sort of thin darkened ring around the tip of the cell which is a good indication that emergence is going to happen shortly.
- Cage the cells in a hair roller to trap any virgin queens that emerge earlier than expected (you can do this anytime after they’re sealed).
- Use the cells before the queen emerges.
- Keep good records and remember that queen development is unaffected by the vagaries of the weather or your social diary … graft young larvae and use the resulting queen cells 10 days later.
Looking after grafted larvae
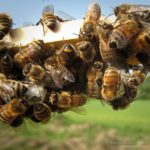
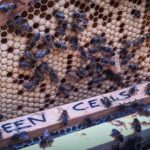
With a little practice a success rate of at least 80% should be achievable when grafting. As described previously, you can easy tell whether the grafting has worked by examining the cell cups about 24 hours later. You’re looking for a 3-4mm relatively smooth, slightly curved wax rim added to the cell. It’s very thin and fragile at this stage. Accepted grafts will also be covered with workers building the cells and feeding the larvae – you may not be able to see the spigot or cell cup at all. Gently move these bees aside if necessary (don’t shake or brush them off) with your finger. It’s actually possible to determine whether the larvae are accepted as little as a couple of hours after grafting but I usually prefer not to disturb the colony again (and often graft late afternoon, so it’s usually getting too late in the day).
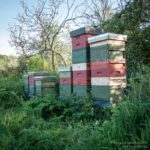
Assuming the cell raising colony is wells stocked with bees I rearrange the boxes at this first inspection so that the Ben Harden brood box is on the top of the stack. The main reason to do this is to save your back. Only do it if there are ample bees in the colony; you do not want the cells to get chilled by placing them over a couple of near-empty supers. In a strong colony, I’ve had three or four supers separating the queenright bottom brood box and the cell raising brood box. In the picture (right) the hive nearest the camera is a Ben Harden cell raising colony. There are three near-full supers between the lower and upper (BH setup) brood box. In addition, since the OSR is nearly over and the stores are capped, I’ve moved one full super over a clearer board above the upper brood box, emptying it ready for extraction.
The next few days are critical. The larvae need to be well fed and the cells need to be drawn out fully. If there’s no flow the cells may be ignored. To prevent this feed a small amount of thin syrup (1:1 w/v) in a frame feeder in the upper box. This is where a fat dummy with an integrated feeder is useful. Arrange this so that the feeder is next to one of the two pollen frames and add about 100-150ml of syrup daily until the cells are sealed. You barely need to disturb the colony to do this … a waft of smoke, lift or slide aside the crown board, add the syrup and close up again. There’s no need to check the cells, the frame of unsealed brood or the bottom box (we’ll come back to these two shortly).
If there is a good flow it is not necessary to feed the colony. Since this is essentially a standard production colony (with an additional upper brood box) the bees should continue to store nectar in the supers.
Are they sealed?
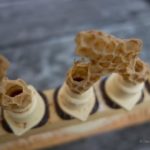
Five days after grafting the cells should be sealed or about to be sealed. The cells will by now be reasonably well sculpted, with a characteristic pitted appearance. The exception is the cell tip which will be pale smooth wax. When checking the cells don’t shake or jolt the cell bar frame and don’t keep the cells out of the colony longer than necessary. Once sealed the colony no longer needs feeding. In a good flow the bees are likely to build brace comb in spaces on the cell bar frame and to fill this with nectar.
Colony inspections
Queens emerge on day 16 (counting from the day the eggs were laid), about twelve days after grafting. This is sufficient time for the colony to swarm, so you must continue with your standard weekly inspections. Simply lift off the upper brood box, gently put it down on an adjacent hive roof, or the upturned roof of the queen rearing colony. Remove the supers if present. Remove the queen excluder, check the bottom box for queen cells in the normal way, then reassemble. Do not forget to put the queen excluder back (or the newly sealed cells will all be torn down). You must also check the frame of unsealed brood in the upper box as they may be making queen cells on it. If so knock them all off. You only need to do this once as there should be no young larvae left once your grafted larvae are in sealed cells.
If there are queen cells in the bottom box (but they haven’t swarmed) I make up a small nuc with the queen, a small amount of brood and a frame of stores in a two frame nucleus box. I then knock all of the queen cells back. If they generate more they’ll be well behind your own grafted larvae. That being the case, use one of the sealed grafted cells to requeen the colony. If the bottom box swarm it’s not a major problem as long as there are enough bees left to keep the grafted cells warm and well fed. If you want to use other swarm control measures remember that the cell raiser has done its job now … you can remove the sealed cells and place them in a suitable incubator until you use them for requeening (just before or after emergence).
Caging the cells
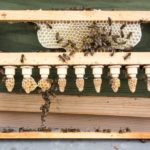
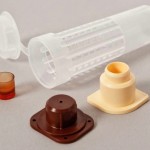
The advantage of the Nicot Cupkit system is that push-fit “hair roller” cages are available to protect the cells and to prevent an early emerging queen from destroying the rest of your hard work. These can be added soon after the cell is sealed, but I usually leave them a few extra days during which time the workers provide all the care the cells need. During this period they will usually sculpt the cell extensively. The only problem is if they build lots of brace comb between cells before you get a chance to fit the cage. If they do, a little gentle surgery with a sharp knife should be sufficient to trim them down to fit into the cage. Don’t force things. You don’t want to squeeze or crush the developing queen.
Using the cells
You should use the cells about 10 days after grafting, which gives you sufficient leeway should a queen emerge a little early. They can be added to mini-nucs, 2-5 frame nuc colonies or full colonies … all of which will be covered in the future.
Join the discussion ...